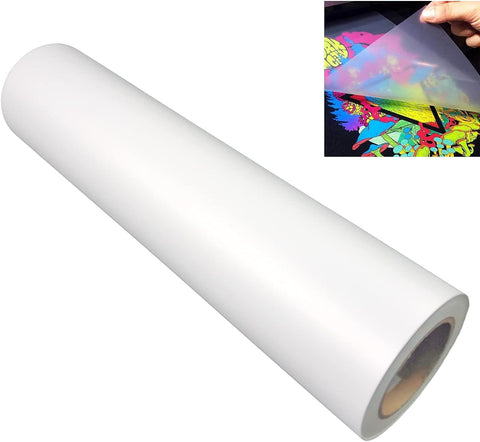


Custom DTF (Direct to Film) Heat Transfer Sheets
- Direct to Film (DTF) printing
- Perfect choice for color blends and gradients
- Printed with CMYK + White inks
- Smooth finish, medium hand feel
- Good on Heat press or Iron-On
- Cold peel release transfer
- Long durability, high stretchability and wash fastness. Will last for years
- Fast turnaround time: Ready to ship or pick up in 2-3 business days
For custom sizes that are not listed, please select one of our gang sheet options from the drop-down menu and we will fit as many identical artworks as possible onto your selected sheet size. Please send the file to info@addprintingpackaging.com
Features
- Printed with the highest quality inks, film, and Kodak TPU powder to give you the brightest whites and colors on any type, material, color, or stretchiness of garment.
- We have vigorously tested our transfers on a variety of garments with washer and dryer tests. The ink will never run off the transfers onto garments and we have had results up to 60 wash tests before degradation.
- Every order is reviewed by one of our 50+ professional designers to ensure proper and optimized printing with ability to assist you with background removal or other cleanup if you leave us notes in checkout.
- Every order is 100% satisfaction guaranteed or we will reprint your order for you!
Pressing Instructions
- No Need To Pre-Press Or Pre-Iron: Removing moisture is unnecessary. Only do a prepress if you so desire.
- Position Your Design: Take your time to line up your transfer in the desired location on your item. Normally, there is no need to use heat-resistant tape on flat heat presses to keep your design in place, however it is highly recommended when pressing transfers onto hats or when using an iron to keep the transfer in place. You’ll get a feel for when this is needed. For more precise positioning, use our DTF Alignment Ruler Set.
- Press: Press your transfer with medium pressure at 310°F / 155°C for 15 seconds. You cannot damage the transfer by pressing with more heat, pressure, or time -- within reason. However, too much heat can damage your garment, so test first and use parchment paper or a protective guard sheet to protect your garment from a direct iron.
- Let It Cool. Then Peel It: After pressing, let your transfer rest until it is cool to the touch (minimum of 15-30 seconds). To speed up the cooling process, utilize our Fast Cool Peel Air Transfer Blower. Once cool, lift the transfer from one corner and gently peel back. We have a saying in the dojo, which is, don’t use your hands, use your EYES. This ensures every piece of your design is adhering to your item. If not, stop peeling, lay it back down, and trouble shoot as follows -- (1.) If some or all of the design does not transfer AND it was cool when peeling, it means there was not enough heat, pressure, or time. Press your transfer again with more pressure and time first (+5-10 seconds). (2.) If that doesn’t work, try 15°F heat increments until you find the sweet spot. You truly cannot damage the transfer by pressing multiple times.
- Final Press & Wash Instructions: Place the parchment paper included or a single layer of t-shirt material over the design and press again for 15 seconds to soften the design, increase durability, and remove shine. If you want a shiny finish, cover with a protective guard sheet for the final press. When washing, flip shirt inside out, wash on cold and dry using low heat or hang.
Custom DTF (Direct to Film) Heat Transfer Sheets
Regular price
$4.00
Sale price
$68.00
Custom DTF (Direct to Film) Heat Transfer Sheets
- Direct to Film (DTF) printing
- Perfect choice for color blends and gradients
- Printed with CMYK + White inks
- Smooth finish, medium hand feel
- Good on Heat press or Iron-On
- Cold peel release transfer
- Long durability, high stretchability and wash fastness. Will last for years
- Fast turnaround time: Ready to ship or pick up in 2-3 business days
For custom sizes that are not listed, please select one of our gang sheet options from the drop-down menu and we will fit as many identical artworks as possible onto your selected sheet size. Please send the file to info@addprintingpackaging.com
Features
- Printed with the highest quality inks, film, and Kodak TPU powder to give you the brightest whites and colors on any type, material, color, or stretchiness of garment.
- We have vigorously tested our transfers on a variety of garments with washer and dryer tests. The ink will never run off the transfers onto garments and we have had results up to 60 wash tests before degradation.
- Every order is reviewed by one of our 50+ professional designers to ensure proper and optimized printing with ability to assist you with background removal or other cleanup if you leave us notes in checkout.
- Every order is 100% satisfaction guaranteed or we will reprint your order for you!
Pressing Instructions
- No Need To Pre-Press Or Pre-Iron: Removing moisture is unnecessary. Only do a prepress if you so desire.
- Position Your Design: Take your time to line up your transfer in the desired location on your item. Normally, there is no need to use heat-resistant tape on flat heat presses to keep your design in place, however it is highly recommended when pressing transfers onto hats or when using an iron to keep the transfer in place. You’ll get a feel for when this is needed. For more precise positioning, use our DTF Alignment Ruler Set.
- Press: Press your transfer with medium pressure at 310°F / 155°C for 15 seconds. You cannot damage the transfer by pressing with more heat, pressure, or time -- within reason. However, too much heat can damage your garment, so test first and use parchment paper or a protective guard sheet to protect your garment from a direct iron.
- Let It Cool. Then Peel It: After pressing, let your transfer rest until it is cool to the touch (minimum of 15-30 seconds). To speed up the cooling process, utilize our Fast Cool Peel Air Transfer Blower. Once cool, lift the transfer from one corner and gently peel back. We have a saying in the dojo, which is, don’t use your hands, use your EYES. This ensures every piece of your design is adhering to your item. If not, stop peeling, lay it back down, and trouble shoot as follows -- (1.) If some or all of the design does not transfer AND it was cool when peeling, it means there was not enough heat, pressure, or time. Press your transfer again with more pressure and time first (+5-10 seconds). (2.) If that doesn’t work, try 15°F heat increments until you find the sweet spot. You truly cannot damage the transfer by pressing multiple times.
- Final Press & Wash Instructions: Place the parchment paper included or a single layer of t-shirt material over the design and press again for 15 seconds to soften the design, increase durability, and remove shine. If you want a shiny finish, cover with a protective guard sheet for the final press. When washing, flip shirt inside out, wash on cold and dry using low heat or hang.